This series is divided into three parts:
Part 1 : Sitecore Workflow QuickStart Guide : Part-1
Part 2 : Sitecore Workflow QuickStart Guide : Part-2
Part 3 : Sitecore Workflow QuickStart Guide : Part-3
In Part-1 we saw creating workflow in sitecore, Now let’s create roles and users and assign workflow states to appropriate roles.
1) Creating Roles
Its best practice to assign workflow rules to the roles and not to the users, so we will first create the roles and then assign it to users. We will create three roles.
1) sitecoreEditor
2) sitecoreReviewer
Now as we have created roles we have to assign roles to a role for authoring a user with this particular role to login into sitecore and do some actions.
We will assign Sitecore Client Authoring to all the three roles.
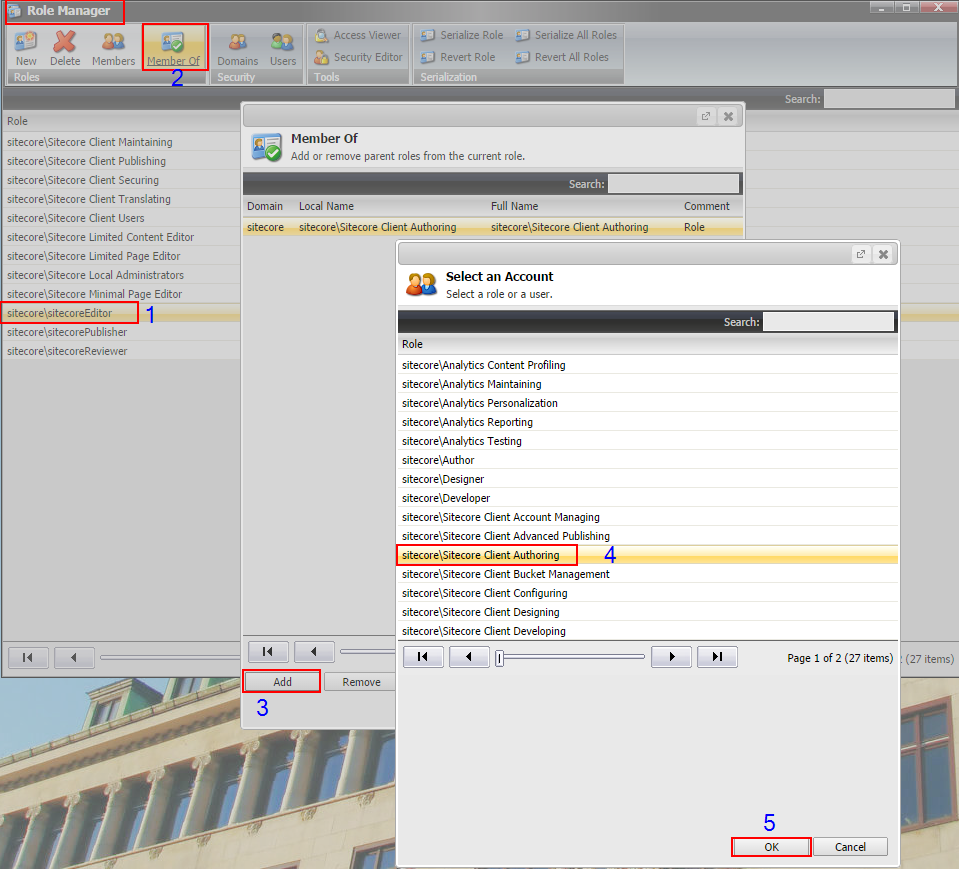
Open Role Manager and follow the steps given in screenshot.
Open Role Manager and follow the steps given in screenshot.
1) Click on sitecore\SitecoreEditor
2) Click on Member Of
3) Click on Add
4) Click on sitecore\Sitecore Client Authoring
5) Click OK
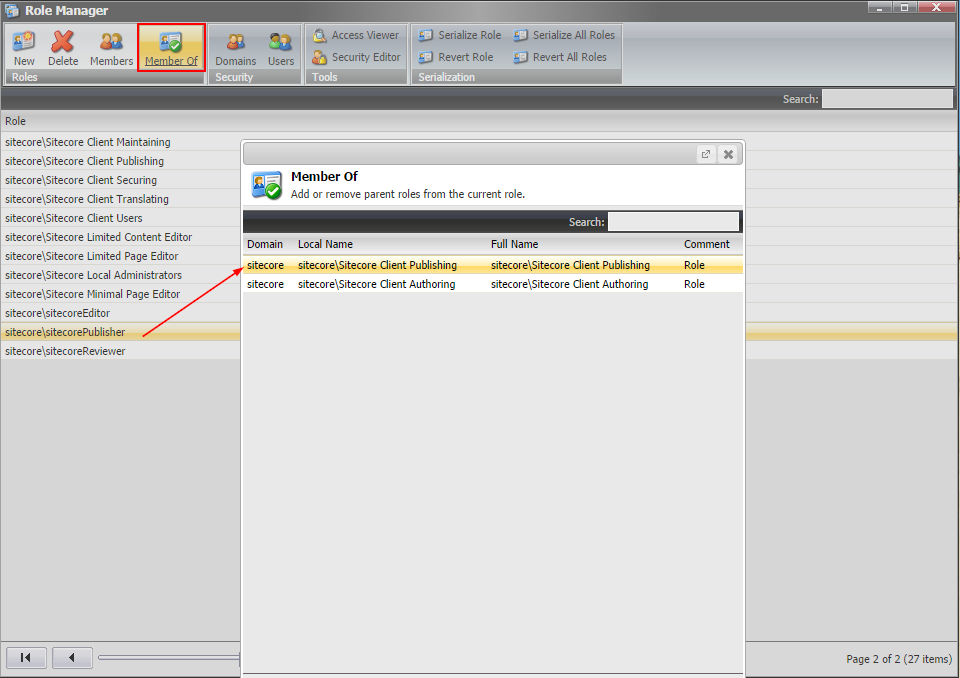
Similarly apply Sitecore Client Authoring to sitecoreReviewer and sitecorePublisher.
Additionally we need to assign Sitecore Client Publishing role to sitecorePublisher. sitecorePublisher should be able to publish items so this guy needs Sitecore Client Publishing role. sitecoreEditor and sitecoreReviewer won’t be able to publish any item of ProductPublishingWokflow workflow.
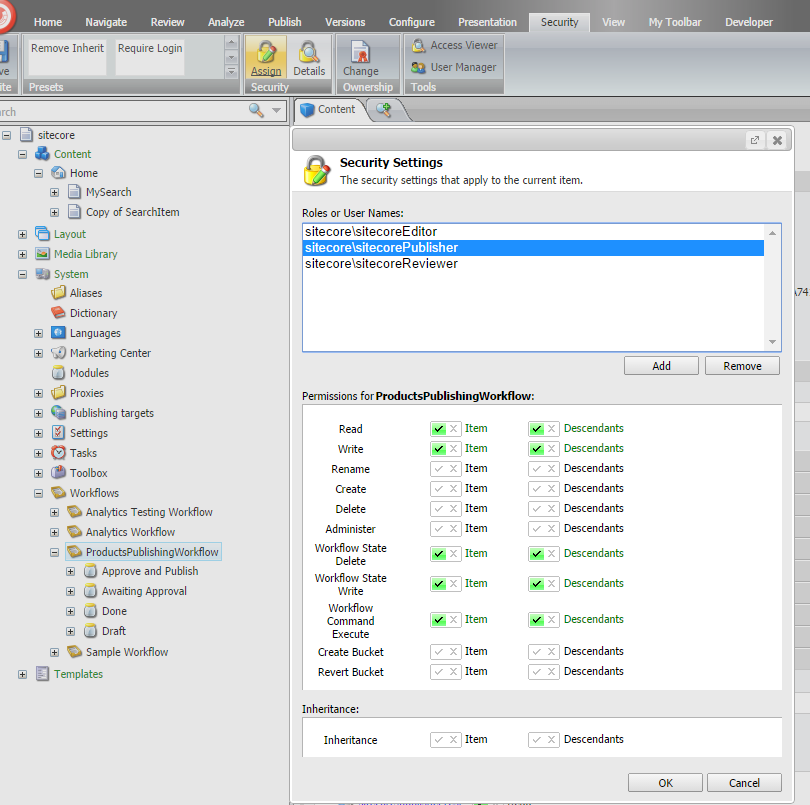
Now for each particular role we have to assign what items that particular user having these roles should be able to access or perform actions.
It’s good to assign access on roles rather than on user because in future if you need to create multiple user who must be able to perform similar actions than it would be easy to create by just assigning the role.
By default Read access is assigned to all the roles.
In my case MySearch is the root item and child items are in workflow. Child item’s template is MyItem template as shown in figure above to whom we have assigned the workflow in standard values items.
In my case MySearch is the root item and child items are in workflow. Child item’s template is MyItem template as shown in figure above to whom we have assigned the workflow in standard values items.
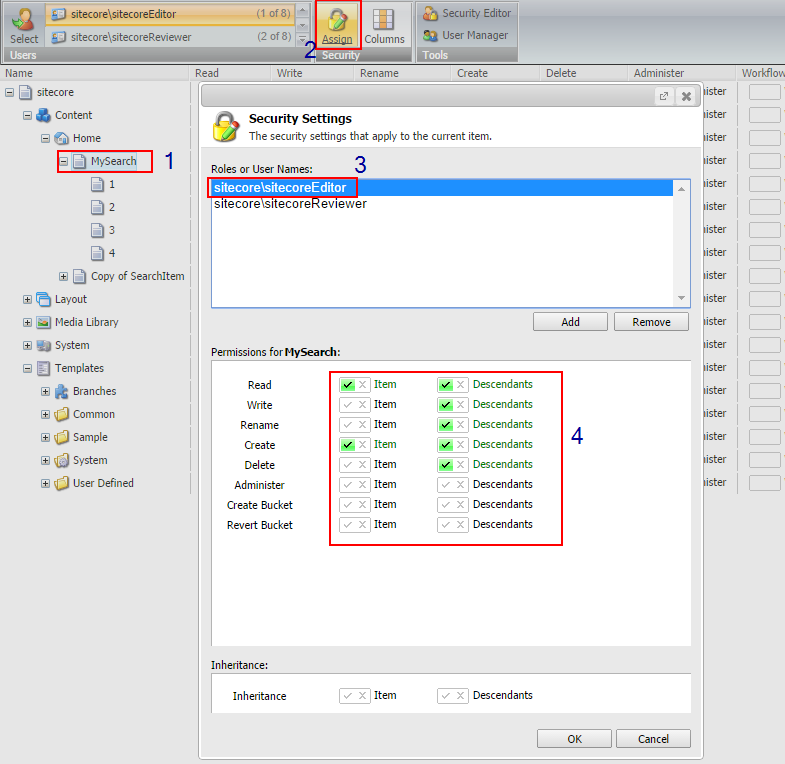
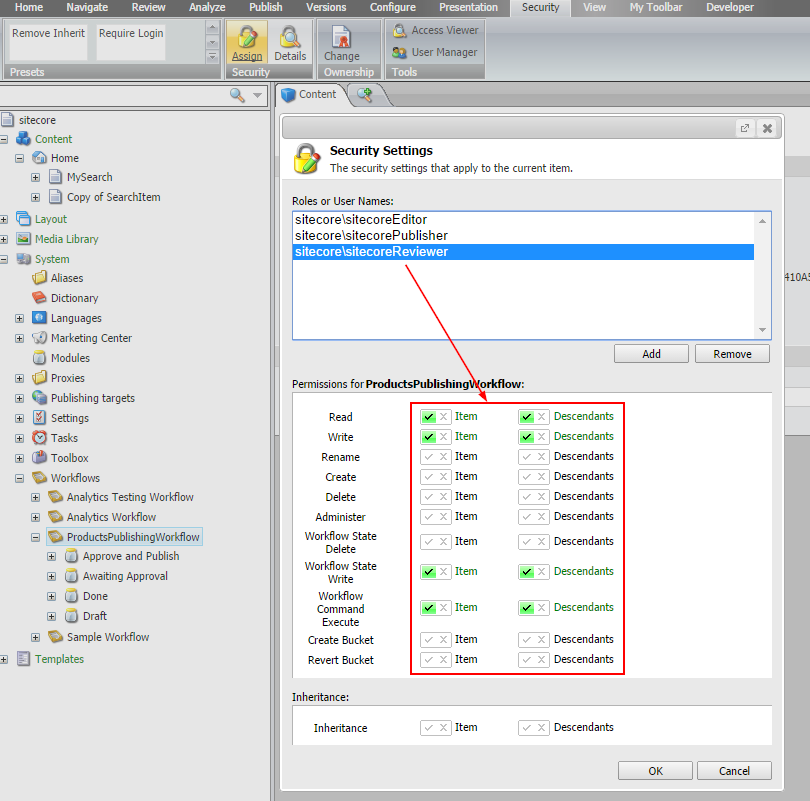
Here we are assigning Read and Create access to MySearch Item and Read, Write, Rename, Create and Delete access to Descendants (Sub Items / Child Items).
Similarly we assign Read, Write access to sitecoreReviewer role.
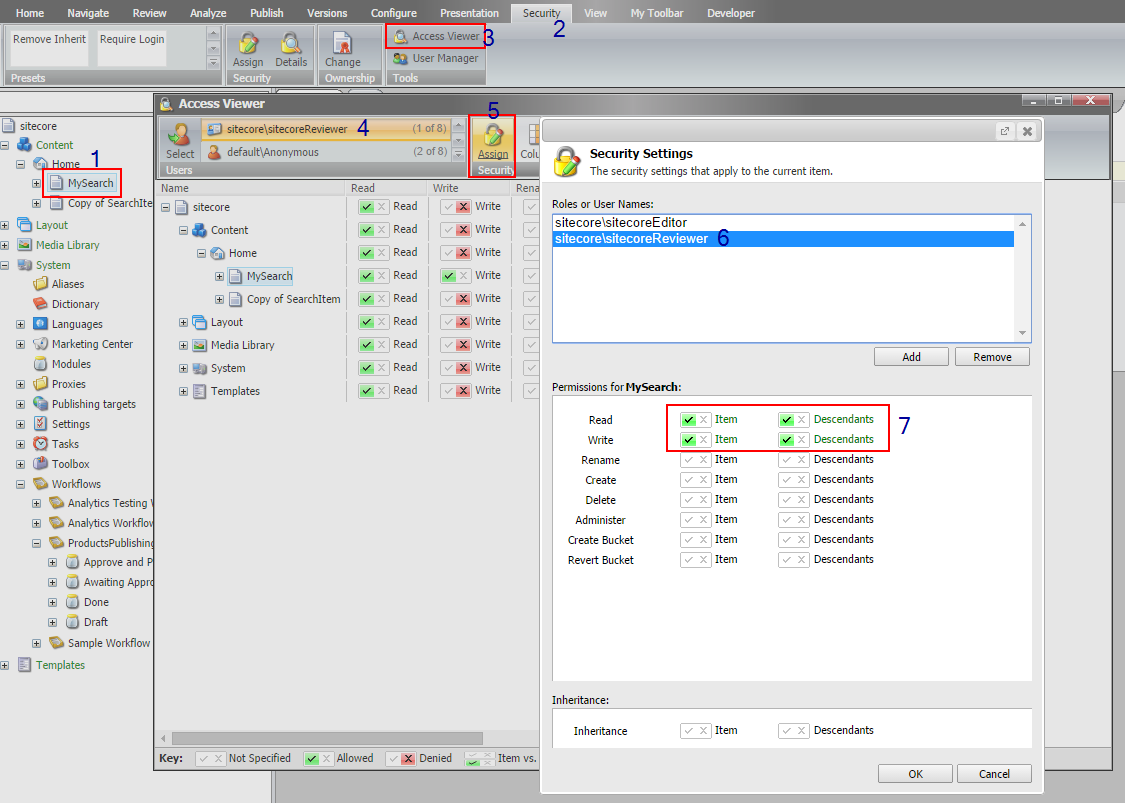
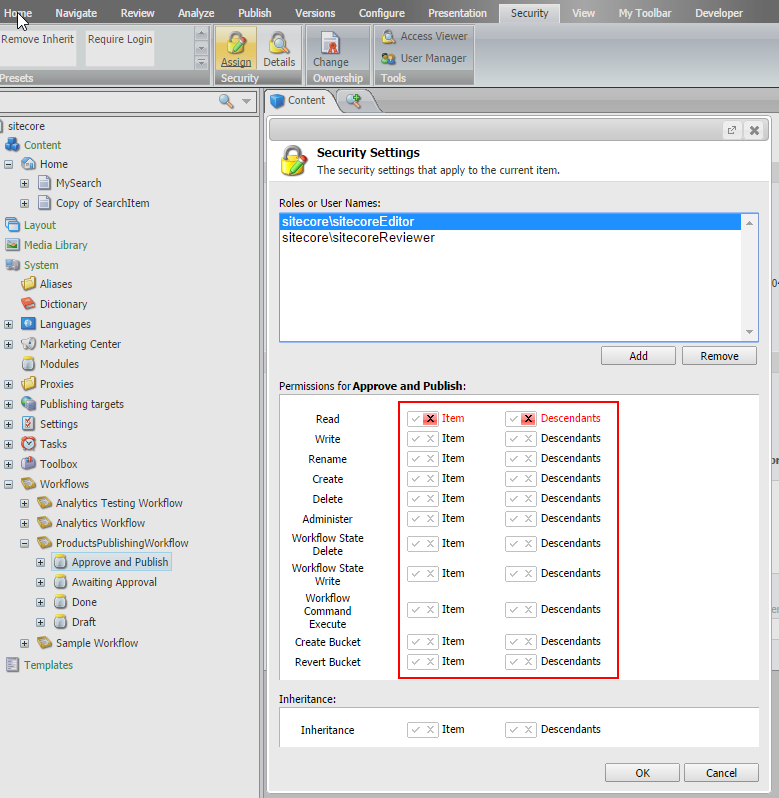
Publisher can approve/reject and publish the items, once publisher approves the item, it will be moved to Done state and it will be automatically published. So similarly provide read/write access as in sitecoreReviewer role to sitecorePublisher role. We already have given an additional role to publisher for publishing the items so publisher can publish the items that are moved Done state incase if the item is in workflow.
Now the very important thing is we have to give proper access of workflow States to these three roles.
Let’s do step by step. First assign it to sitecoreEditor

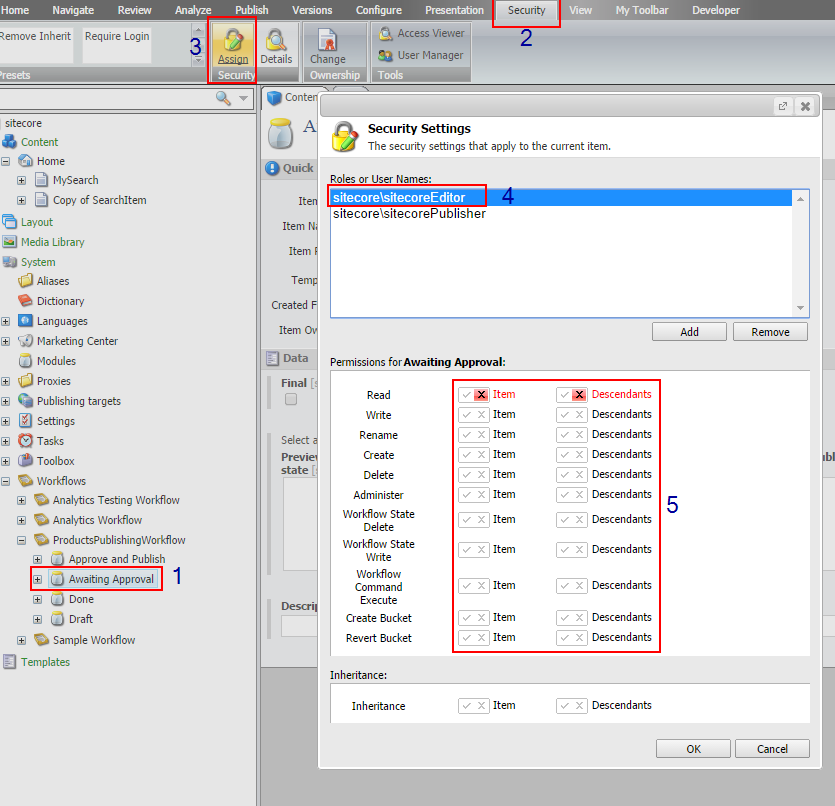
Ok now sitecoreEditor should only be able to create, edit and submit item to reviewer so we have to assign workflow states accordingly. sitecoreEditor should not be able to Approve or Publish Items. We have already assigned security settings to ProductsPublishingWorkflow and its Descendants. So Draft State is by default applied to the sitecoreEditor. Now we have to deny read access to Awaiting Approval, Approve and Publish and Done states from sitecoreEditor roles
Similarly sitecoreReviewer should not be able to create or submit item. It should only be able to approve or reject items.
sitecoreReviewer needs Awaiting Approval State access so we already have assigned it to Workflow and its descendants so it is by default applied to Awaiting Approval state. No need to assign or deny anything to Awaiting Approval state for sitecoreReviewer.
Remove Draft, Done, Approve and Publish states access from sitecoreReviewer as reviewer is not allowed to so.
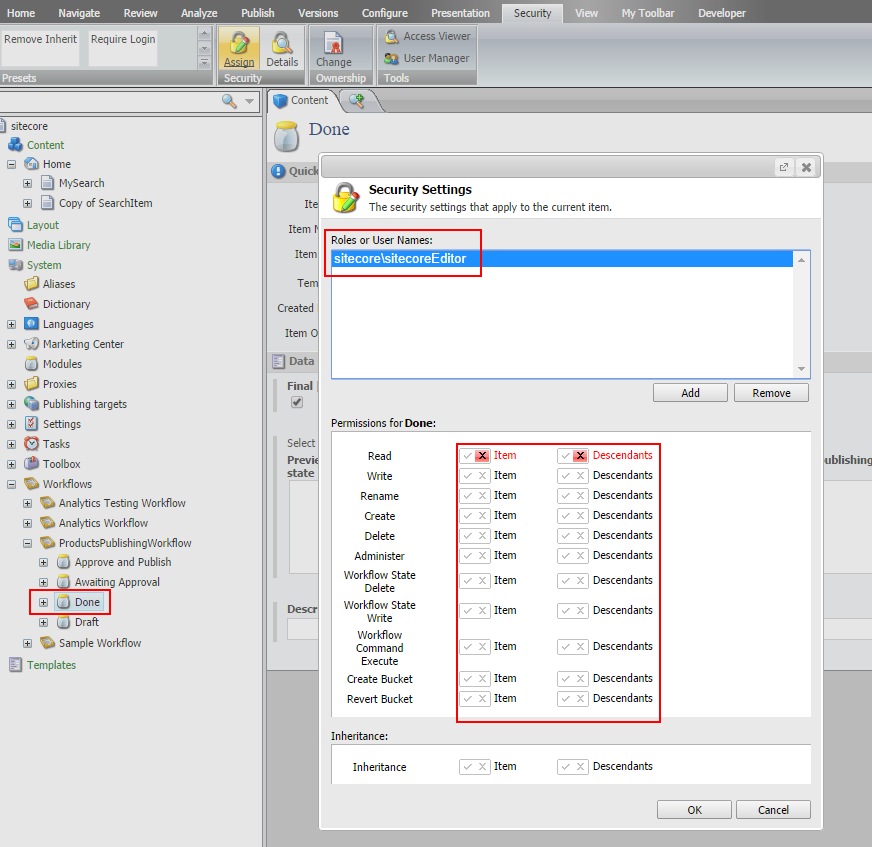
And similarly for sitecorePublisher. Sitecore Publisher won’t be able to create item. It can only approve item for publish or reject item. So we have to deny read access for Awaiting Approval and Draft State.
2) Creating Users
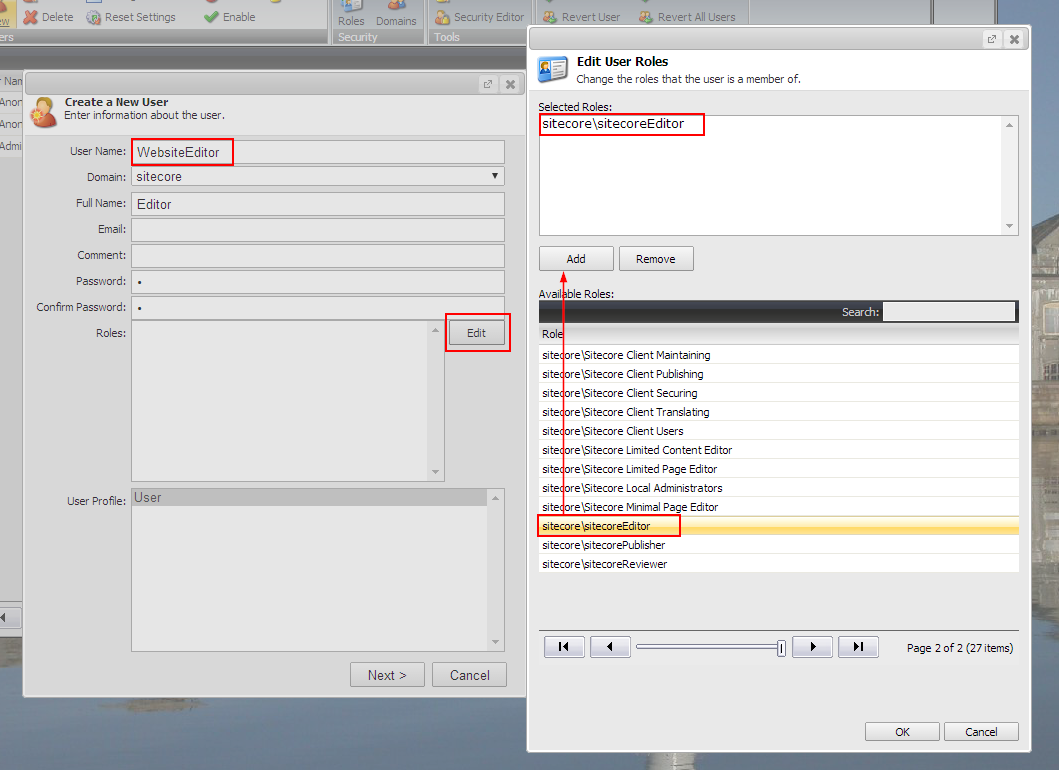
Now we will create three users and assign these three roles respectively.
1) WebsiteEditor
2) WebsiteReviewer
3) WebsitePublisher
Refer this link to know how to create new roles [pg. 29] and how to create new users [pg. 15].
While creating user you will get an option to assign the roles to each user so assign the appropriate roles i.e. WebsiteEditor user will have sitecoreEditor role, WebsiteReviewer user will have sitecoreReviewer role and WebsitePublisher user will have sitecorePublisher role respectively.
Refer below screen to create a user and assigning roles.
That’s it. We are done.
You can now test it with different users.
You can now test it with different users.
Continued in Part-3.