Sitecore SXA (Sitecore Experience Accelerator) is the buzzword nowadays in the Sitecore World. The Sitecore Experience Accelerator provides reusable, templated UX layouts and components to help you get up and running quickly. One of the important features of Sitecore SXA is Creative Exchange, which is helpful for executing the development and designing process to be done in parallel. The Creative Exchange process is designed to facilitate several different teams working on a website. For example, the team that is working on the theme of the site can work in parallel with other teams.
In this post, I will go through the step by step process to show you how to export, change the color of the text and then import back in Sitecore with the Creative Exchange.
I installed:
- Sitecore Experience Platform 8.2 Update-5
- Sitecore PowerShell Extensions-4.6 for Sitecore 8
- Sitecore Experience Accelerator 1.4 rev. 170623 for 8.2
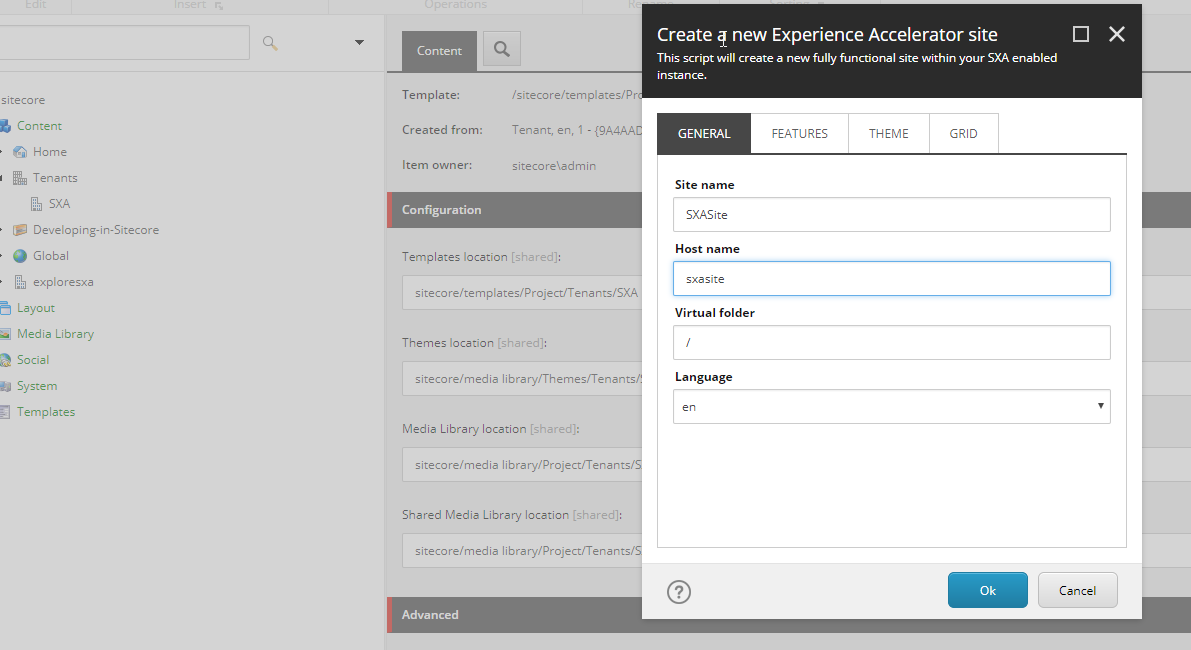
Create new site – I’m creating a new Sitecore site called sxasite.
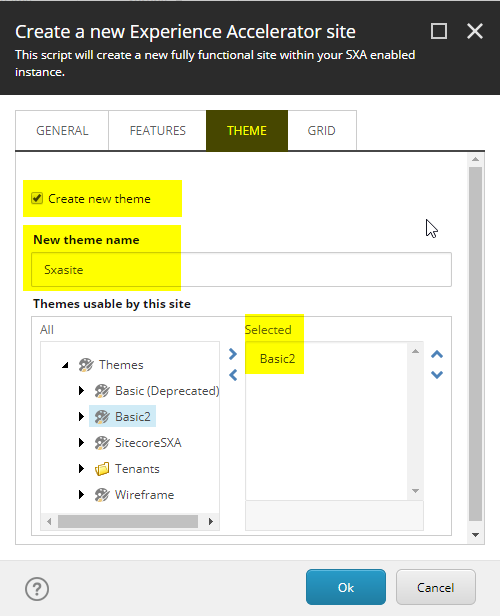
Go to THEME tab and enable Create new theme and provide new theme name and press Ok. It will take approx. 5 minutes to get the Site ready for you.
IMPORTANT: It is must to create a new theme for your site. If you do not create a new theme and try to export, update and import then it won’t import in Sitecore. Sitecore won’t allow updating the existing theme styling. So make sure to create new theme while creating a new Site.
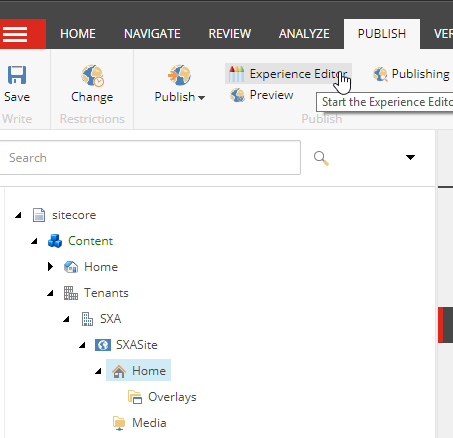
Our new site is ready, now select the Home Item and click on Experience Editor.
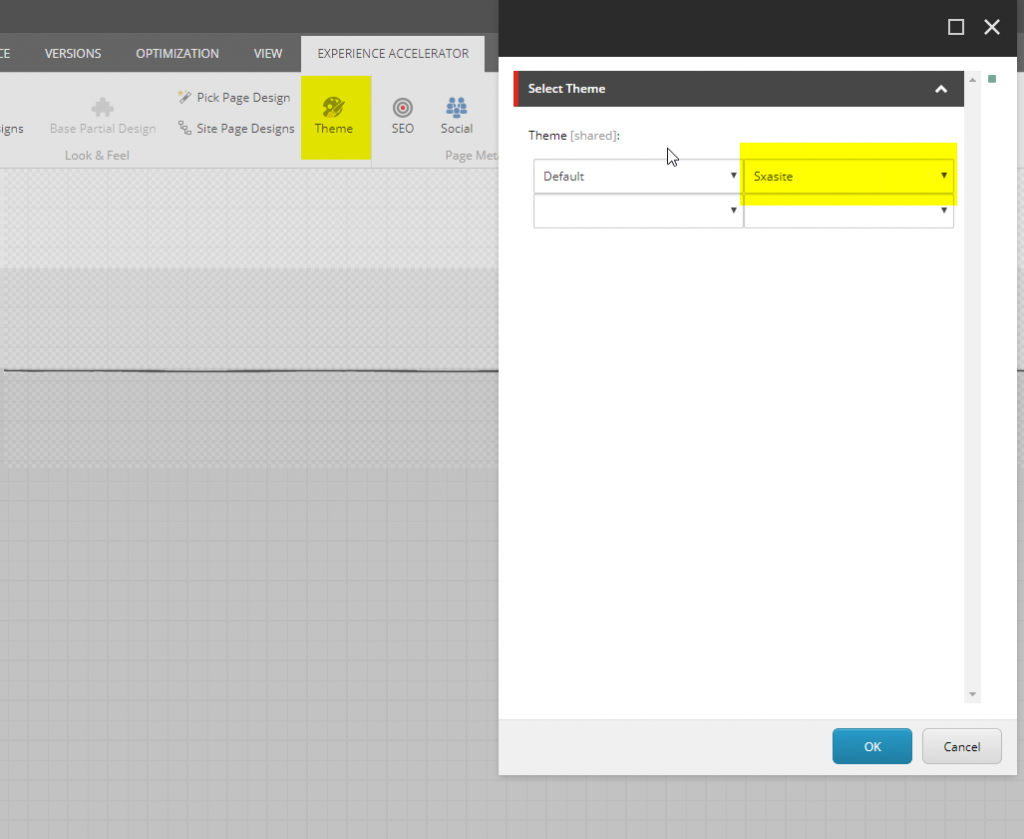
You’ll see the three placeholders – header, main and footer where we can drag and drop components from the Toolbox which appears in right. But before we do that, let’s change the theme in Experience Editor and select the new theme which we created specifically for this site.
In Sitecore content tree new theme media data will be at : /sitecore/media library/Themes/Tenants/SXA/SXASite/Sxasite
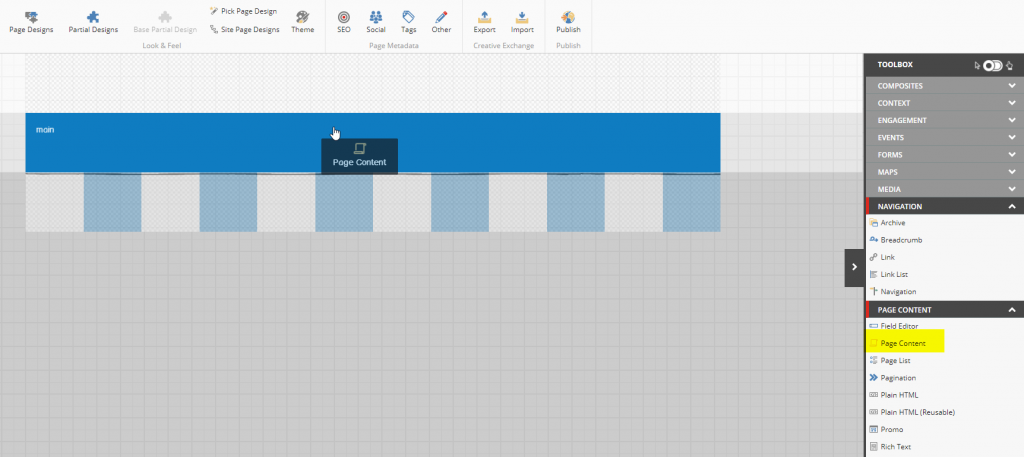
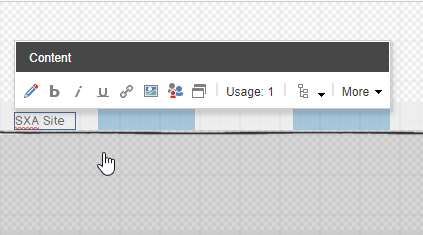
Drag and Drop Page Content from Toolbox in the main content area, enter text you want and save.

Click on Export in Experience Accelerator Tab. All the default settings are proper – Make sure – Agency drop is enabled. Click Next. You’ll get an option to download the Zip file. You can share this zip file with the Creative Agency for the designing purpose.
In Directory Zip file is created at – D:\inetpub\wwwroot\sitecoresxa\Data\packages\CreativeExchange\2017-09-09_19-42_SXA-SXASite_en_Default_AgencyDrop
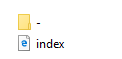
Extract zip file — You’ll see index.html and a folder with the name – (Hyphen).

Open index.html in any editor and navigate to the text which you have entered in Page Content Rich Text. Above that there will be a class called add_your_classes_here – After that just enter myCustomClass class name and save index.html.
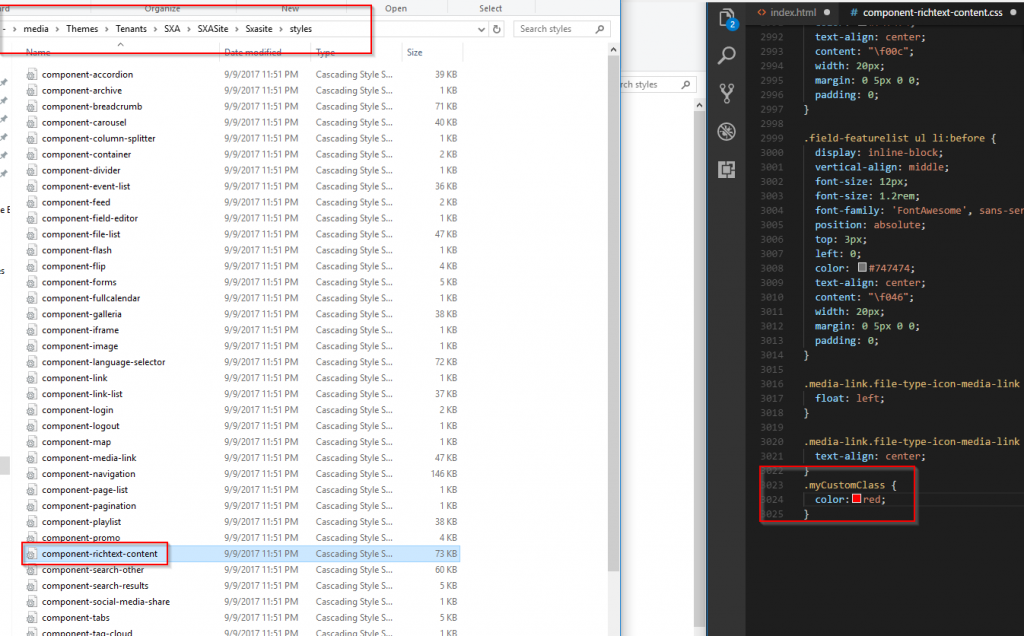
Add styling in component-context-content.css as shown in above screenshot and save.
You can now open index.html in any of your favorite web browser and see the color of the text.
Now create a zip file of the – folder and index.html – In a similar fashion as it was exported.
Import the newly created zip file using the Creative Exchange Import Option in Experience Accelerator.
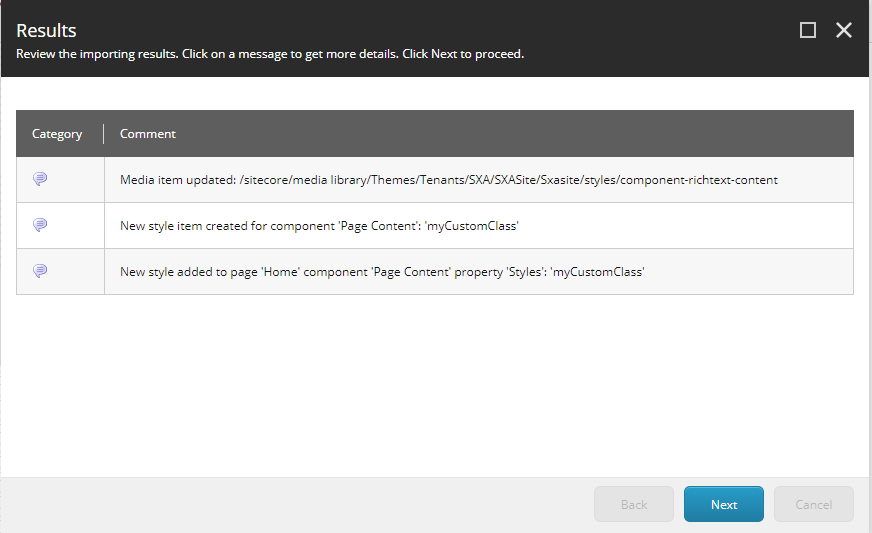
We should get the message saying Media Item updated and new style added for Page Content in Home page.
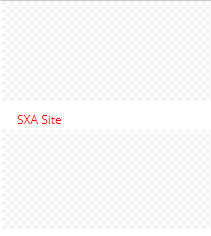
Hooray — We see that color is changed! Try to hard refresh your page if you don’t see the changes.
Do shoot your suggestions/feedback/queries in the comment section below!
Happy Sitecoring! 🙂